
Press on nail adhesive tabs offer a glue-free way to attach false nails quickly and cleanly. This guide explains what these tabs include, how to apply them properly, and how to get the best results in different conditions. Information is based on the product’s supplied features and manufacturer tips.
What’s included and who this is for
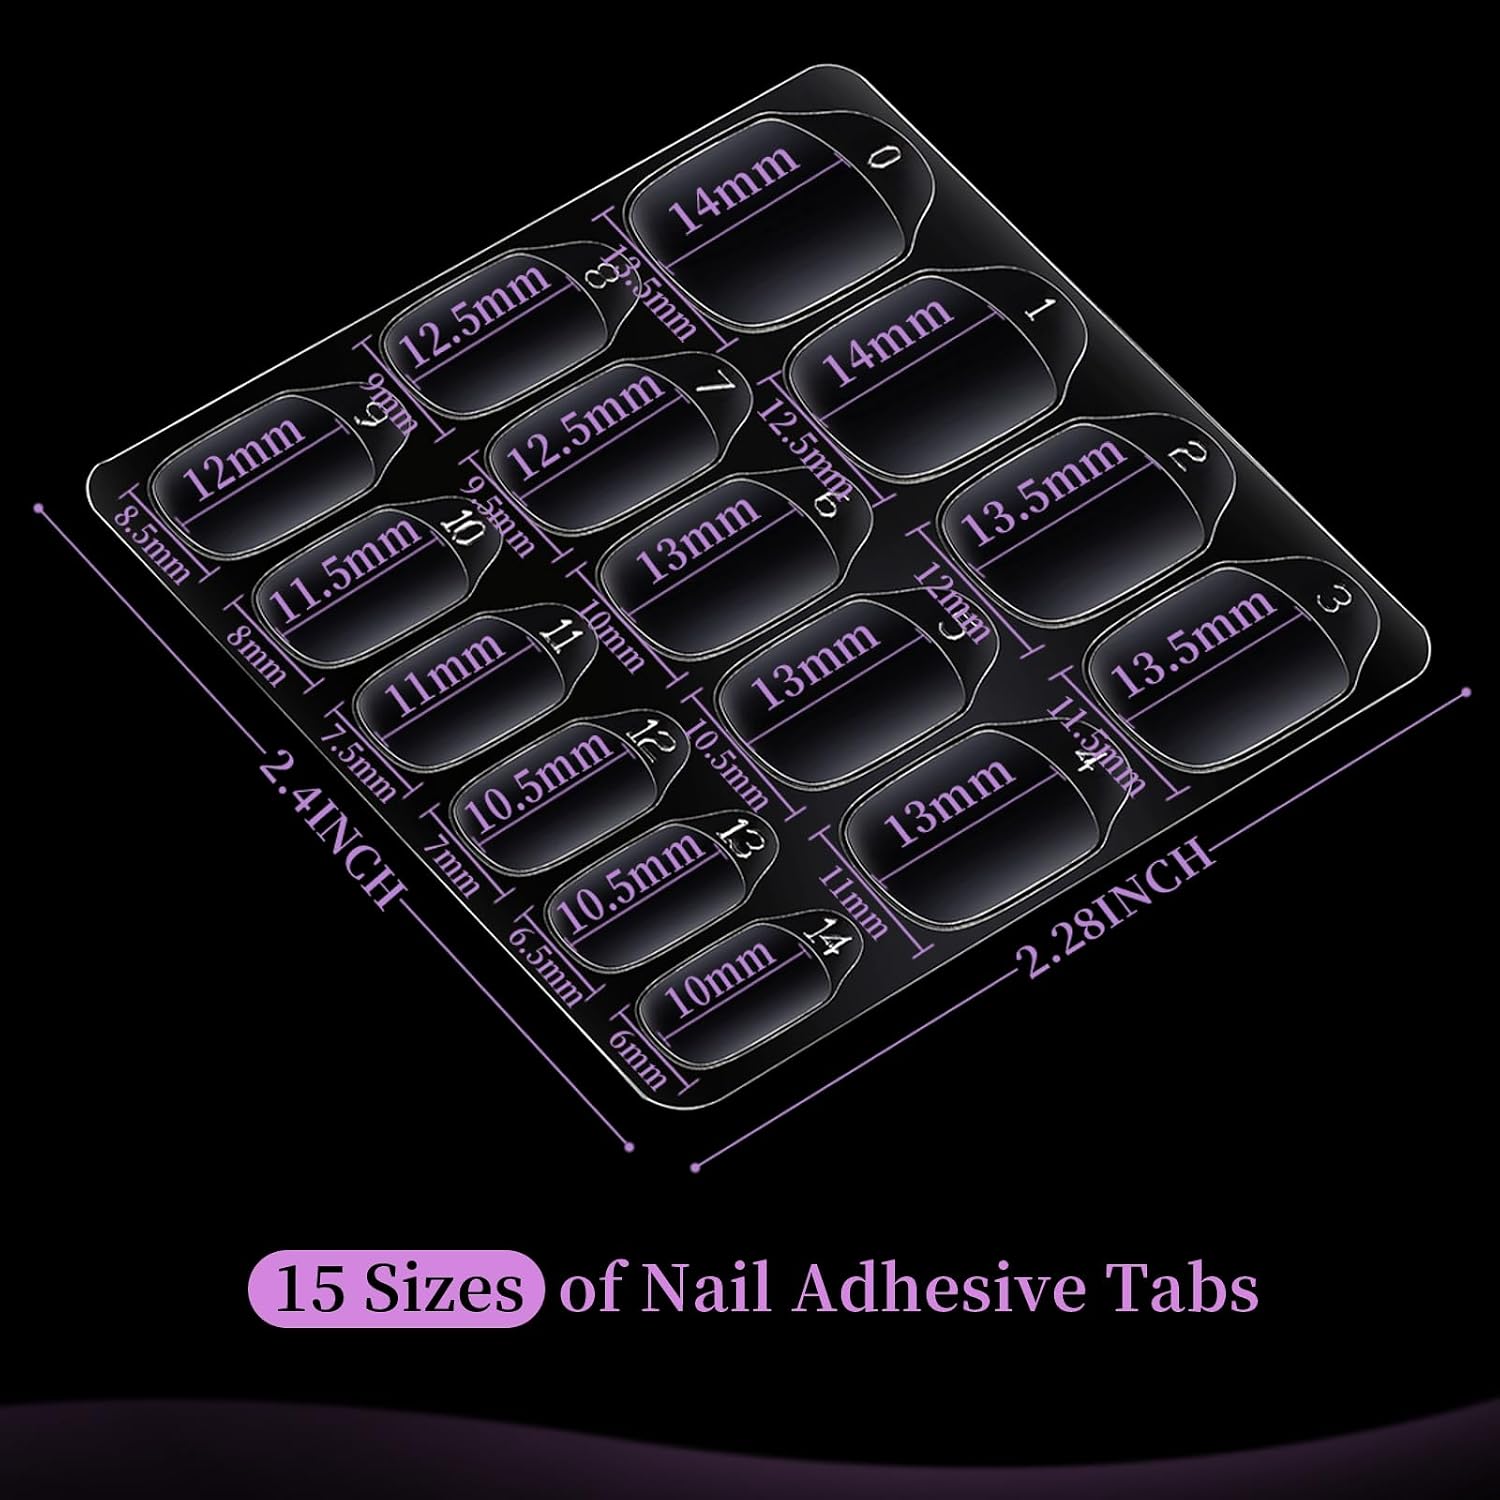
The kit contains 40 sheets with 15 different tab sizes on each sheet, totaling 600 adhesive tabs. Each tab is numbered to help you find the best fit for every finger. The tabs are self-adhesive and waterproof, and the thin 0.3mm profile is designed to conform to flat and curved nail beds.
This set is intended for people who use press-on nails and want a no-glue option that keeps false nails reusable and avoids direct glue on natural nails.
Key features in context
- 15 sizes: Multiple widths and lengths increase the chance of a precise fit for each finger, which helps achieve more reliable adhesion and a neater look.
- 600pcs total: With 40 sheets and 15 sizes per sheet, you get a large supply intended for many applications — the manufacturer notes enough for at least 20 uses.
- Ultra-thin construction: At roughly 0.3mm thick, the tabs are thin and flexible. This ductility helps them sit smoothly between the natural nail and a press-on nail, accommodating both flat and curved nail shapes.
- Numbered tabs: Each tab is labeled so you can quickly pick matching sizes without trial-and-error each time.
- Waterproof and self-adhesive: Tabs resist brief contact with water and stick without additional glue, simplifying application and cleanup.
Step-by-step application
Follow these steps to apply press-on nails using the adhesive tabs, incorporating the manufacturer’s recommended actions for better hold:
- Begin with clean, dry nails. Remove oils and residues so the tab can adhere properly.
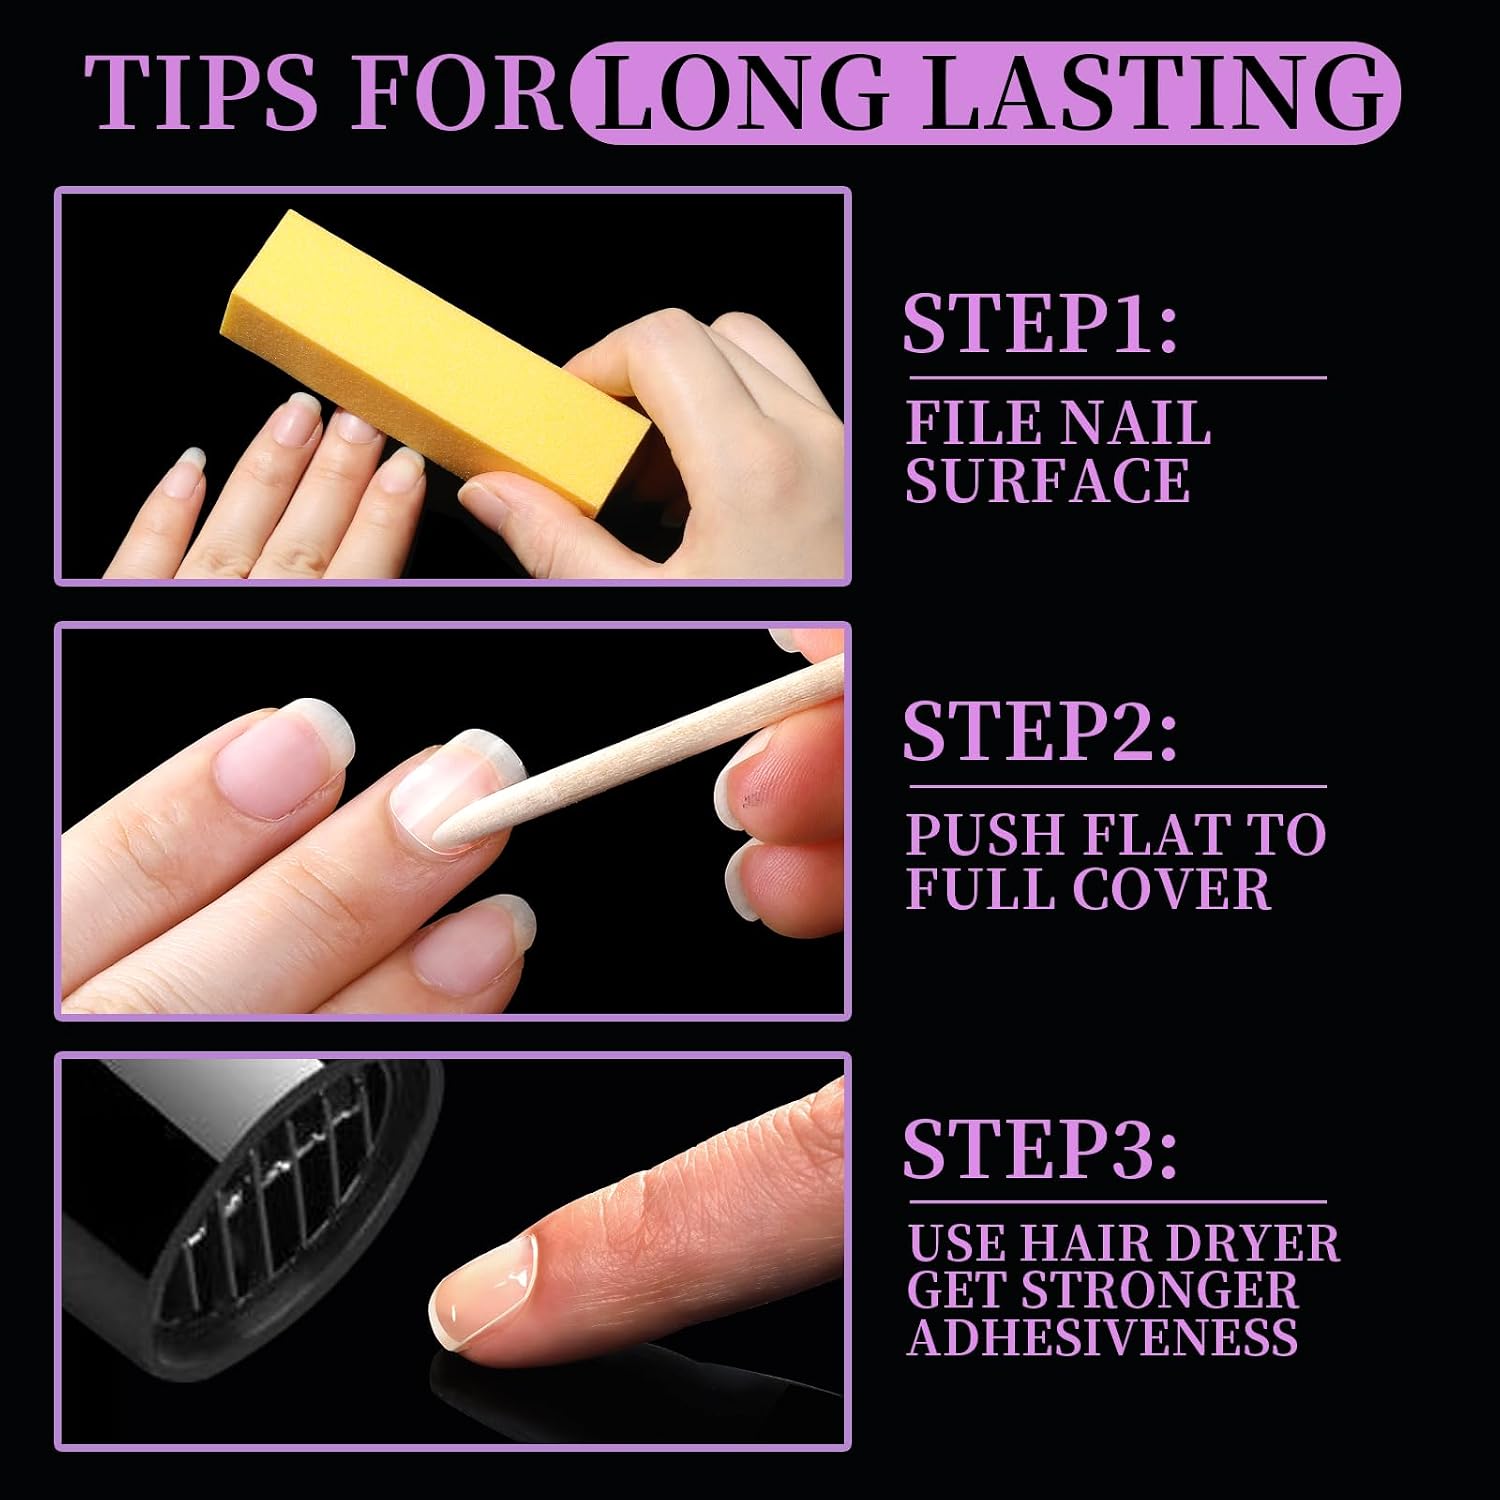
- If your nail surface is very smooth, use a sponge file to gently roughen the nail. This creates more surface texture for the tab to grip.
- Select the best-fitting tab for each finger. Tabs are numbered to make matching easier.
- Peel a tab from the sheet and stick it onto your natural nail, ensuring the adhesive covers the nail plate fully.
- Use a hair dryer to heat the tab for about 15 seconds. The brief heat can improve tack.
- Use a wooden stick or cuticle pusher to press and flatten the tab, making sure it covers the nail surface evenly and removes air pockets.
- Remove the thin protective film from the outer side, then heat the exposed tab for another 15 seconds.
- Place the press-on nail over the tab and press firmly for about 30 seconds to secure. Check alignment and adjust quickly if needed.
- Wash your hands after 1–2 hours to ensure the tab sets fully and to remove any residual adhesive particles.
Why the heating steps matter
The product notes that short bursts of heat before and after removing the protective film help improve stickiness. This can be especially useful in cooler environments when adhesive performance is reduced.
Tips for longer wear, especially in cold weather
Adhesive performance can vary with temperature. The manufacturer recommends a few simple adjustments when it’s chilly:
- File the nail surface slightly to increase adhesion.
- Use a hair dryer to warm the tab before and after removing the film (about 15 seconds each time).
- Press and hold the false nail for 30 seconds to ensure full contact.
- Avoid exposing newly applied nails to cold or very wet conditions for the first hour.
How to remove and reuse nails
These adhesive tabs are designed to let you remove press-on nails without damaging either the natural nail or the false nail. To remove:
- Soak the fingertip in warm water to soften the tab adhesive.
- Gently lift and slide the press-on nail away from the natural nail; do not pull forcefully.
- If you plan to reuse your false nails, avoid scraping or scratching their surface when removing the tab.
The product indicates that this method allows your favorite fake nails to remain intact and reusable after removal.
Limitations and realistic expectations
Keep these practical points in mind when choosing adhesive tabs:
- Stickiness varies with weather: Cold temperatures can reduce adhesion. Use the suggested heating and surface preparation steps for better results.
- Temporary hold: Tabs are intended for easy application and removal, which means they may not offer the permanent bond of liquid nail glue. Follow the manufacturer guidance to maximize wear time.
- Fit matters: Proper sizing is important. Tabs come in many sizes to help, but an incorrect size can cause lifting or short wear time.
Suitability and who benefits most
These adhesive tabs suit anyone who wants a quick, glue-free way to apply press-on nails and values easy removal and nail preservation. They are particularly useful when:
- You want to avoid liquid adhesive directly on the natural nail.
- You plan to reuse your false nails multiple times.
- Your nail beds are flat or curved — the thin tabs are designed to adapt to both shapes.
Safety notes
The manufacturer states that these tabs will not damage your nail surface or your fake nails when used as directed. For safe use:
- Soak in warm water for removal rather than forceful prying.
- Avoid using on broken or irritated skin near the nail bed.
- Follow the provided heating and pressing instructions to minimize lifting and reduce the need for forceful removal.
Summary and buying note
In short, this 600-piece set from Teenitor includes 15 size options per sheet, numbered tabs for easier selection, a thin 0.3mm profile, and enough quantity for multiple uses. It’s a practical choice for glue-free press-on nail application, with specific steps recommended to improve adhesion in cool weather and for routine removal without damage.
Priced at USD 7.99 (prices may change).
Use the numbered sizing and the heating/pressing routine to get the best, longest-lasting results from these adhesive tabs.